DIY: Replacing/Upgrading Fuel Pump
Specifically using a walbro fuel pump
Applicable Years: Walbro has these kits for 89-00 Civics, 90-01 Integras.
Difficulty: 2 out of 5
Estimated Time: 30min-45min
Required Parts:
- Ratchet
- 10mm Socket
- 17mm Socket
- Pliers
- Philips head screw driver
- Cutters
- 10mm open ended wrench
Steps:
0. Preliminarily DISCONNECT YOUR BATTERY! DISCONNECT YOUR BATTERY
! DISCONNECT YOUR BATTERY
You can also proceed to relieving the pressure in your gas line. There are many ways of doing this you can look up, I simply undo the gas cap to relieve a little pressure then go to it as I don't mind spilling a bit of fuel when unhooking the lines.
1. First thing you'll have to do is remove your seats I have an EG8 so my process will be for removing 92-95 sedan & coupe seats but I also found some info on removing seats for an EG hatch. Just google if you have something different. Anyway for the coupe and sedan you just have to remove the four 10mm bolts, two on each side of the back rest:

Here's some help for people with EG's
then use your 10mm wrench to get the one bolt holding the bottom portion of the seat:
And simply lift up from the rear in pull it out:
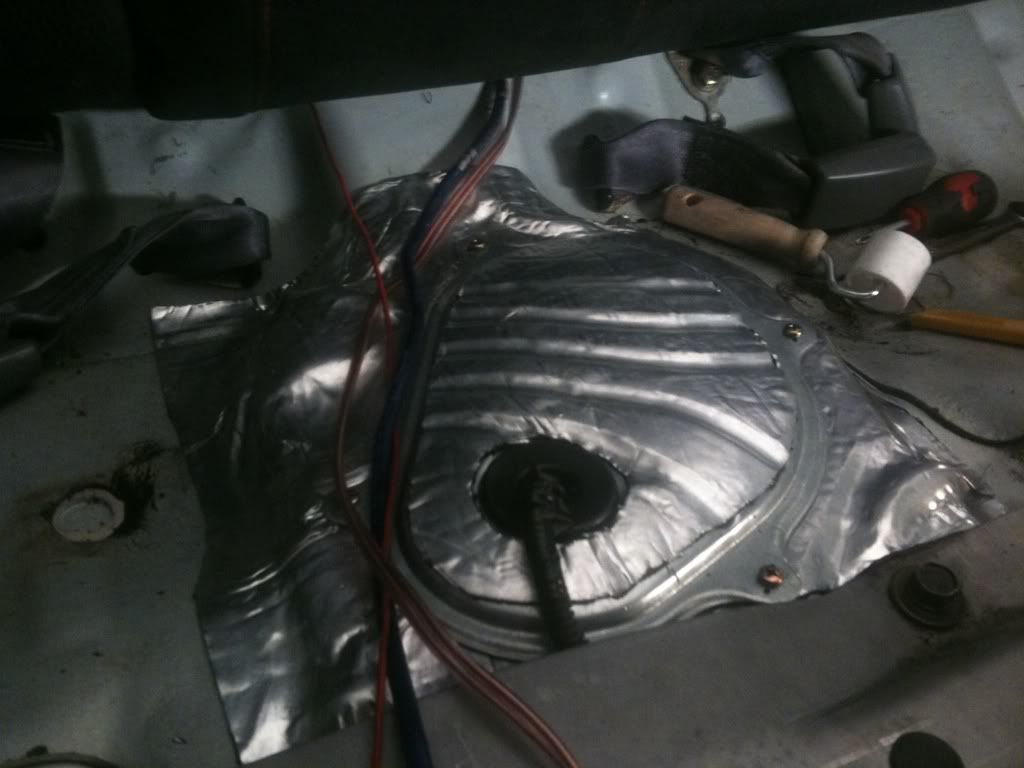
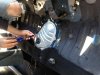
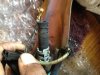
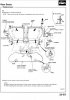
2. Once its up you'll need to remove the 4 screws around the fuel pump cover.
3. Then you'll see whats going on under there.
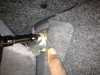
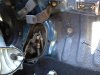
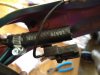
4. From here move that black boot back to reveal the connector underneath and unplug it. Then use your pliers to remove the clamp on the smaller line on the right, and use your 17mm ratchet to remove the banjo bolt in the middle, MAKING SURE NOT TO LOSE THE WASHERS UNDERNEATH IT! Finally remove the six 10mm bolts that go around the fuel pump bracket and slowly pull it out towards the front of the car as it's angles like that.
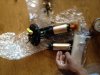
5. Once you've got it out cover your tank with something to make sure no bugs go in there, and here's a picture of the old oem pump and the new walbro.
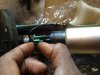
6. Now that you've got it out push off this green half of the connector
7. Then unplug the whole connector
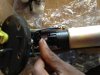
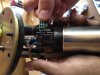
8. Once that's out just push the bottom half of the pump with the filter on it forward until it comes out of the bracket, It will take a little force but it won't break or anything, just be kinda careful, then undo the hose clamp and pull it off the old hose.
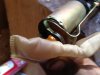
9. When you get that pushed out you'll need to remove the old filter because your going to reuse the black rubber piece (circled in yellow) on the new pump, there will be a small metal washer that's helping to hold it in place, your new fuel pump should have came with a new washer but make sure not to lose your old one either. :
10. Put the black rubber piece on the new filter
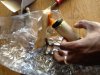
11. Now place the filter on its spot on your new pump. There's only one way it will go as there is a plastic piece that sticks out of the pump. Remember that washer I was talking about above, well you'll need to place it over the plastic piece sticking up from the pump. I couldn't get the new one on so I ended up reusing my old one:
12. From hear you'll want to replace the old hose if your kit came with a new hose, so undo the clamp from the other side and pull it off:
13. The walbro hose comes longer than necessary so you'll want to use your cutters to cut it to length then reinstall it with the new hose clamps they provide to you:
14. When your done slide the hose back on, clamp it up, and plug in the connectors.
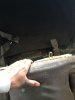
15. Finally slide it back in towards the rear of the car into the black square in your tank, tighten the 6 smaller bolts, tighten the larger banjo bolt making sure to put one washer below the line and one above as they were before, slide the line and clamp back on, wipe everything off, tighten you gas cap if you loosened it, and plug your battery back in, but don't screw the cover back on yet.
16. Now What I did to get it ready was turn the key into the on position then turn the car back off twice, that way the fuel pump could prime and suck some fuel in and that way you can double check to make sure everything tight and no fuel is squirting out of the lines.
17. Finally screw the cover back on and slap your seats back in and your done.
Review: This process is pretty simple just make sure you don't have any open flames or sparks or really hot stuff near your car while you have the gas tank open and be patient but quick while you put the new pump on the old bracket as gasoline evaporates fairly quickly. The new pump works like a charm and I suggest walbro if you need a replacement as they're cheap especially in the CC store and have been proven to be a great product.
Specifically using a walbro fuel pump
Applicable Years: Walbro has these kits for 89-00 Civics, 90-01 Integras.
Difficulty: 2 out of 5
Estimated Time: 30min-45min
Required Parts:
- Ratchet
- 10mm Socket
- 17mm Socket
- Pliers
- Philips head screw driver
- Cutters
- 10mm open ended wrench
Steps:
0. Preliminarily DISCONNECT YOUR BATTERY! DISCONNECT YOUR BATTERY
! DISCONNECT YOUR BATTERY
You can also proceed to relieving the pressure in your gas line. There are many ways of doing this you can look up, I simply undo the gas cap to relieve a little pressure then go to it as I don't mind spilling a bit of fuel when unhooking the lines.
1. First thing you'll have to do is remove your seats I have an EG8 so my process will be for removing 92-95 sedan & coupe seats but I also found some info on removing seats for an EG hatch. Just google if you have something different. Anyway for the coupe and sedan you just have to remove the four 10mm bolts, two on each side of the back rest:
Here's some help for people with EG's
then use your 10mm wrench to get the one bolt holding the bottom portion of the seat:
And simply lift up from the rear in pull it out:
2. Once its up you'll need to remove the 4 screws around the fuel pump cover.
3. Then you'll see whats going on under there.
4. From here move that black boot back to reveal the connector underneath and unplug it. Then use your pliers to remove the clamp on the smaller line on the right, and use your 17mm ratchet to remove the banjo bolt in the middle, MAKING SURE NOT TO LOSE THE WASHERS UNDERNEATH IT! Finally remove the six 10mm bolts that go around the fuel pump bracket and slowly pull it out towards the front of the car as it's angles like that.
5. Once you've got it out cover your tank with something to make sure no bugs go in there, and here's a picture of the old oem pump and the new walbro.
6. Now that you've got it out push off this green half of the connector
7. Then unplug the whole connector
8. Once that's out just push the bottom half of the pump with the filter on it forward until it comes out of the bracket, It will take a little force but it won't break or anything, just be kinda careful, then undo the hose clamp and pull it off the old hose.
9. When you get that pushed out you'll need to remove the old filter because your going to reuse the black rubber piece (circled in yellow) on the new pump, there will be a small metal washer that's helping to hold it in place, your new fuel pump should have came with a new washer but make sure not to lose your old one either. :
10. Put the black rubber piece on the new filter
11. Now place the filter on its spot on your new pump. There's only one way it will go as there is a plastic piece that sticks out of the pump. Remember that washer I was talking about above, well you'll need to place it over the plastic piece sticking up from the pump. I couldn't get the new one on so I ended up reusing my old one:
12. From hear you'll want to replace the old hose if your kit came with a new hose, so undo the clamp from the other side and pull it off:
13. The walbro hose comes longer than necessary so you'll want to use your cutters to cut it to length then reinstall it with the new hose clamps they provide to you:
14. When your done slide the hose back on, clamp it up, and plug in the connectors.
15. Finally slide it back in towards the rear of the car into the black square in your tank, tighten the 6 smaller bolts, tighten the larger banjo bolt making sure to put one washer below the line and one above as they were before, slide the line and clamp back on, wipe everything off, tighten you gas cap if you loosened it, and plug your battery back in, but don't screw the cover back on yet.
16. Now What I did to get it ready was turn the key into the on position then turn the car back off twice, that way the fuel pump could prime and suck some fuel in and that way you can double check to make sure everything tight and no fuel is squirting out of the lines.
17. Finally screw the cover back on and slap your seats back in and your done.
Review: This process is pretty simple just make sure you don't have any open flames or sparks or really hot stuff near your car while you have the gas tank open and be patient but quick while you put the new pump on the old bracket as gasoline evaporates fairly quickly. The new pump works like a charm and I suggest walbro if you need a replacement as they're cheap especially in the CC store and have been proven to be a great product.
Attachments
-
 467.9 KB Views: 3,448
 -
 349.5 KB Views: 3,403
 -
 604.9 KB Views: 3,426
 -
 647.2 KB Views: 3,417
 -
 706.6 KB Views: 3,404
 -
 430.9 KB Views: 3,363
 -
 552.6 KB Views: 3,353
 -
 445.9 KB Views: 3,280
 -
 441.3 KB Views: 3,271
 -
 412.7 KB Views: 3,236
 -
 529.7 KB Views: 3,250
 -
 370.7 KB Views: 3,205
 -
 375.9 KB Views: 3,163
 -
 611.5 KB Views: 3,196
 -
 606.4 KB Views: 3,181
 -
 540.8 KB Views: 3,172
 -
 35.4 KB Views: 3,395
 -
 26.2 KB Views: 3,379