
Headlight Armor - DIY Install – Smoked Taillight Kit - Honda Civic Coupe
Supplies needed.
Smoked Taillight film kit - Smoke shown but they are also available in a darker Stealth Smoke
Application squeegee (included in kit)
You will need to have a
Clean trigger spray bottle with warm water (plant mister works great)
Lint free detail cloths
Razor knife (small snap blades are good) for any final trimming as needed
Positive can do attitude (option but is helpful)
Hair Dryer (optional if warm out, necessary if it is cool)
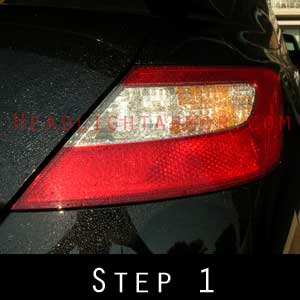
Step 1: Clean the lenses - Including inside the trunk opening. Clean your hands. Make sure there are no residues from the cleaning process remaining on the lenses or your hands.
Without removing the lens cover from the backing paper hold it up to the lens and make sure you have the correct one / orientation (i.e. Slightly ovoid lenses).
Wet down one lens and your hands with water - a clean spray bottle / plant mister works great.
Note: On the Civic Coupe it is probably easier to install these with the trunk open

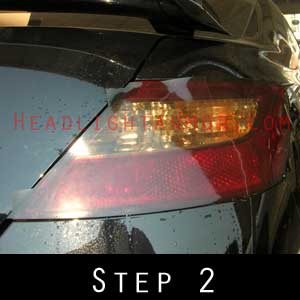
Step 2: If it is cool - below 65 degrees F gently warming the material with a hair dryer will help things along.
Carefully remove the cover from the backing paper - handling the adhesive as little as possible - Use handling tabs when possible. Mist down the adhesive side and gently place on the lens
Step 3: Handling the edges align the front point of the piece - (right side of the photo).
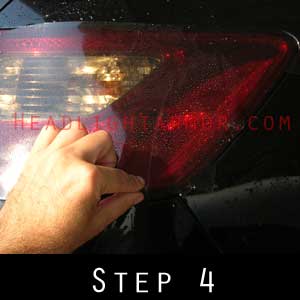
Step 4: Then generally align the bottom front corner and outside edge (far right on the photo). The piece will be 'floating' on the beads of water on the lens. Be gentle the adhesive is pressure sensitive.
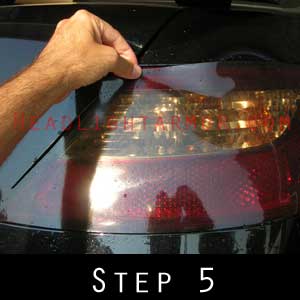
Step 5: Then generally align the top back corner and trunk opening edge. The kit is going to slightly wrap into the trunk opening so align to leave extra as shown. Some stretching pushing and prodding is necessary when aligning the kit. The piece will be 'floating' on the beads of water on the lens. Be gentle the adhesive is pressure sensitive.
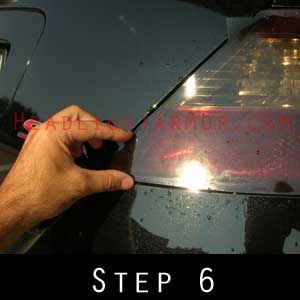
Step 6: Continue aligning trunk opening and then align the lower inside corner.
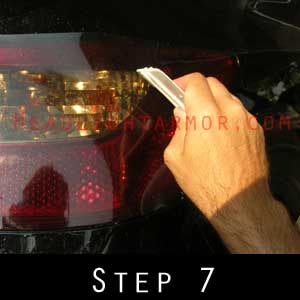
Step 7: Mist down both sides of the kit at the front corner (be sure to keep it aligned) Squeegee the front corner - about the first 3-4 inches.
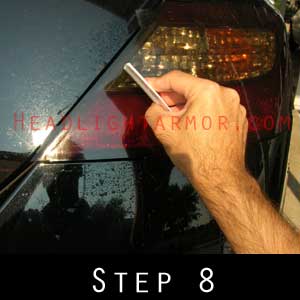
Step 8: Continue to the very bottom inside corner of the kit squeegeeing firmly. If you leave a bubble gently lift, re-wet and re-squeegee. Bubble are generally caused from two things - not enough pressure on the squeegee and not enough moisture under the kit.
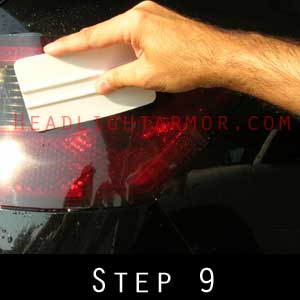
Step 9: Re-wet the outside of the kit and squeegee firmly from the center-line you just squeegeed toward the edge of the kit as shown.
NOTE: This kit was installed with ambient air temps ~80 degrees F. If it is cool out the use of a hair dryer on low will be necessary for steps 9-11.
Do not overheat the film, you just want to warm to about 90 degrees F.
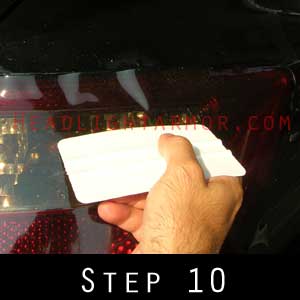
Step 10: Repeat Step 9 on the top half of the kit, making sure the trunk side corner is still aligned.
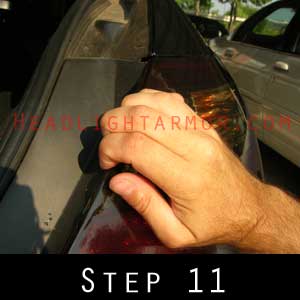
Step 11: Squeegee the edge of the trunk opening firmly (to make sure you do not have any trapped water near the edge) and then press the material around the edge and into the trunk opening as shown.
Step 12: After the kit has set up for 10 minutes carefully trim off the handling tabs with a sharp razor knife. If you have any areas that are misaligned or overhanging you can either wrap the edge if it a flat surface or simply trim off the excess.
Go over the edges with a suede detail cloth / paper towel wrapped squeegee to make sure the edge is fully set. Gentle heat from a hair dryer on low can help things along if it is cool out.
Now you are done, stand back and enjoy!
If there are ant small bubbles or small wrinkles they will flatten out as the water evaporated from underneath the film and as the adhesive sets.
DO NOT WASH THE VEHICLE FOR 3 DAYS.
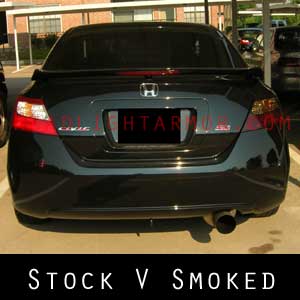
The Smoke (30%) covers shown in this tutorial will turn the bright red tails to a rich deep dark burgundy red. If you are looking for something darker you can select Stealth Smoke (20%).
With our Smoked taillight covers you will be able to change to look of your vehicle - while still allowing your brake lights and running lights to function as intended.
You can remove these at some point in the future if you are so inclined - though they can only be used once.
Let us know if you have any questions about the install.
Supplies needed.
Smoked Taillight film kit - Smoke shown but they are also available in a darker Stealth Smoke
Application squeegee (included in kit)
You will need to have a
Clean trigger spray bottle with warm water (plant mister works great)
Lint free detail cloths
Razor knife (small snap blades are good) for any final trimming as needed
Positive can do attitude (option but is helpful)
Hair Dryer (optional if warm out, necessary if it is cool)
Step 1: Clean the lenses - Including inside the trunk opening. Clean your hands. Make sure there are no residues from the cleaning process remaining on the lenses or your hands.
Without removing the lens cover from the backing paper hold it up to the lens and make sure you have the correct one / orientation (i.e. Slightly ovoid lenses).
Wet down one lens and your hands with water - a clean spray bottle / plant mister works great.
Note: On the Civic Coupe it is probably easier to install these with the trunk open
Step 2: If it is cool - below 65 degrees F gently warming the material with a hair dryer will help things along.
Carefully remove the cover from the backing paper - handling the adhesive as little as possible - Use handling tabs when possible. Mist down the adhesive side and gently place on the lens
Step 3: Handling the edges align the front point of the piece - (right side of the photo).

Step 4: Then generally align the bottom front corner and outside edge (far right on the photo). The piece will be 'floating' on the beads of water on the lens. Be gentle the adhesive is pressure sensitive.
Step 5: Then generally align the top back corner and trunk opening edge. The kit is going to slightly wrap into the trunk opening so align to leave extra as shown. Some stretching pushing and prodding is necessary when aligning the kit. The piece will be 'floating' on the beads of water on the lens. Be gentle the adhesive is pressure sensitive.
Step 6: Continue aligning trunk opening and then align the lower inside corner.
Step 7: Mist down both sides of the kit at the front corner (be sure to keep it aligned) Squeegee the front corner - about the first 3-4 inches.
Step 8: Continue to the very bottom inside corner of the kit squeegeeing firmly. If you leave a bubble gently lift, re-wet and re-squeegee. Bubble are generally caused from two things - not enough pressure on the squeegee and not enough moisture under the kit.
Step 9: Re-wet the outside of the kit and squeegee firmly from the center-line you just squeegeed toward the edge of the kit as shown.
NOTE: This kit was installed with ambient air temps ~80 degrees F. If it is cool out the use of a hair dryer on low will be necessary for steps 9-11.
Do not overheat the film, you just want to warm to about 90 degrees F.
Step 10: Repeat Step 9 on the top half of the kit, making sure the trunk side corner is still aligned.
Step 11: Squeegee the edge of the trunk opening firmly (to make sure you do not have any trapped water near the edge) and then press the material around the edge and into the trunk opening as shown.
Step 12: After the kit has set up for 10 minutes carefully trim off the handling tabs with a sharp razor knife. If you have any areas that are misaligned or overhanging you can either wrap the edge if it a flat surface or simply trim off the excess.
Go over the edges with a suede detail cloth / paper towel wrapped squeegee to make sure the edge is fully set. Gentle heat from a hair dryer on low can help things along if it is cool out.

Now you are done, stand back and enjoy!
If there are ant small bubbles or small wrinkles they will flatten out as the water evaporated from underneath the film and as the adhesive sets.
DO NOT WASH THE VEHICLE FOR 3 DAYS.
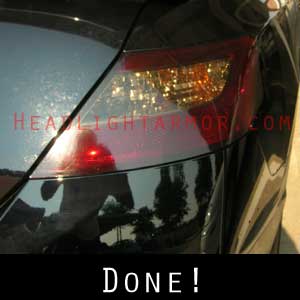
The Smoke (30%) covers shown in this tutorial will turn the bright red tails to a rich deep dark burgundy red. If you are looking for something darker you can select Stealth Smoke (20%).
With our Smoked taillight covers you will be able to change to look of your vehicle - while still allowing your brake lights and running lights to function as intended.
You can remove these at some point in the future if you are so inclined - though they can only be used once.
Let us know if you have any questions about the install.
