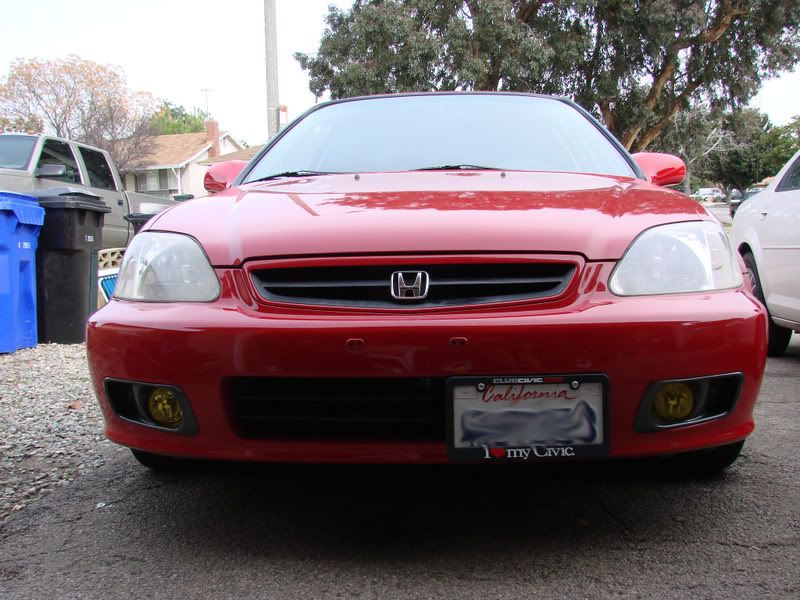
Figured i'd post how to do it here since i just recently made my own license plate relocator and it works VERY well might i add.
Instructions are intended for use on a 6th gen civic. Other models may use this DIY as a guide i suppose.
Total Cost: approx. $4.00
Total Time: 15 min.
Tools needed:
Drill
Drill bits
Screwdriver(phillips and flat head)
Ratchet and sockets
Marker
What you need to buy:
4 x m6-1.00 x 16 bolts (in whatever style you prefer: allen head, phillips, flat head, hex cap)
4 x m6-1.00 nuts (lock nuts recommended)
2 x L-brackets (found mine with the deck building supplies @ lowes)
look similar to this:

Washers - optional (will disperse pressure on the bumper went mounting)
Procedure:
1. If the hole in your L-brackets are too small for the bolts you bought, use a drill bit slightly larger than the bolt but small than the head of the bolt and drill out the holes in the bracket.
(optional): Sand and paint the brackets the color of your choice
2. Remove your front bumper. This was done on a 2000 civic. For this car there were seven clips on top as well as two bolts on bottom, two screws on bottom, and a screw in each wheel well.
3. Bolt your license plate onto the brackets using two m6-1.00 x 16 bolts and two m6-1.00 nuts
(optional): Add a clubcivic.com license plate frame to give it some personality.
4. With the license plate bolted to the brackets, line it up with your bumper where you'd like the license plate to be and mark where you'll need to drill holes to connect the other side of the brackets to the bumper.
5. Drill out the markings you just made with the same drill bit you used earlier to drill out the holes in the L-brackets
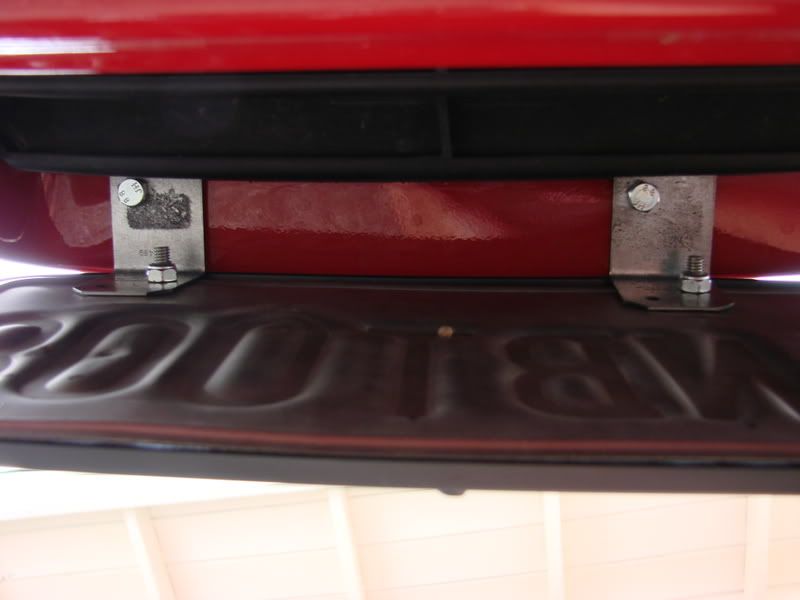
6. Attach the license plate (which should already be on brackets) to the bumper using two m6-1.00 x 16 bolts, two m6-1.00 nuts, and optionally, two washers.
7. Put bumper back on and you're finished.
Final results:

From underneath

Instructions are intended for use on a 6th gen civic. Other models may use this DIY as a guide i suppose.
Total Cost: approx. $4.00
Total Time: 15 min.
Tools needed:
Drill
Drill bits
Screwdriver(phillips and flat head)
Ratchet and sockets
Marker
What you need to buy:
4 x m6-1.00 x 16 bolts (in whatever style you prefer: allen head, phillips, flat head, hex cap)
4 x m6-1.00 nuts (lock nuts recommended)
2 x L-brackets (found mine with the deck building supplies @ lowes)
look similar to this:

Washers - optional (will disperse pressure on the bumper went mounting)
Procedure:
1. If the hole in your L-brackets are too small for the bolts you bought, use a drill bit slightly larger than the bolt but small than the head of the bolt and drill out the holes in the bracket.
(optional): Sand and paint the brackets the color of your choice
2. Remove your front bumper. This was done on a 2000 civic. For this car there were seven clips on top as well as two bolts on bottom, two screws on bottom, and a screw in each wheel well.
3. Bolt your license plate onto the brackets using two m6-1.00 x 16 bolts and two m6-1.00 nuts
(optional): Add a clubcivic.com license plate frame to give it some personality.
4. With the license plate bolted to the brackets, line it up with your bumper where you'd like the license plate to be and mark where you'll need to drill holes to connect the other side of the brackets to the bumper.
5. Drill out the markings you just made with the same drill bit you used earlier to drill out the holes in the L-brackets
6. Attach the license plate (which should already be on brackets) to the bumper using two m6-1.00 x 16 bolts, two m6-1.00 nuts, and optionally, two washers.
7. Put bumper back on and you're finished.
Final results:

From underneath


