UPDATE:
I got my
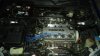
AC running again, but not without an "adventure". I order a kit including a
rebuilt compressor, drier, expansion valve and seals from a well reviewed shop down in Miami, figuring if any problems came up that they were a long drive away or a quick shipment away. Well, the first rebuilt compressor kept locking up so I had to request a replacement (free of cost) and it arrived in 2 days. When that one was installed, the
condenser decided to leak the very next day. Needless to say I was quite frustrated. The radiator shop agreed to sell me the condenser at-cost and over-nighted it for free.
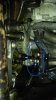
While installing it yesterday, I realized that the lower radiator and condenser mount brackets were bent upward as if a previous owner ran over something that pushed them all upward. I adjusted them back down and everything fit in much better. FYI, I found it easier to slide in the condenser and hook up the lower line before sliding in and installing the fan. My local shop filled the AC system with freon and it's
all working well now. The engine bay is much quieter now as well. I'm also glad because these 100+ degree feeling days with 80%-ish humidity can be a pain with long drives.
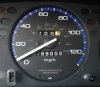
Now on to figuring out why my radiator fan isn't turning on...
(skip to post #8)
http://www.clubcivic.com/forum/threads/overheating-radiator-fan-issue.225093/