Nice work! I did some of that during my front suspension refresh, and kinda wishing I had done bearings when I was in there. I've got brand new rotors and pads but still a bit of vibration in the pedal. Did you pull and press the bearings yourself/with a press?
Nice work! I did some of that during my front suspension refresh, and kinda wishing I had done bearings when I was in there. I've got brand new rotors and pads but still a bit of vibration in the pedal. Did you pull and press the bearings yourself/with a press?
I'm not sold on it being the wheel bearing yet, I think there's some jank going on with the calipers too. I did press them myself, I have a little harbor freight hydraulic press that works pretty well if you have enough metal bits to hold the knuckle level.
I'm not sold on it being the wheel bearing yet, I think there's some jank going on with the calipers too. I did press them myself, I have a little harbor freight hydraulic press that works pretty well if you have enough metal bits to hold the knuckle level.
Was excited to install a subwoofer under the seat, like I had in the green civic. Bought another Rockville, but they've updated the design, and it's taller now. Doesn't fit under the seat
That was the Green Civic! Another Civic that a friend gave me to rebuild the engine on. I didn't document it very well, but it got fixed up and sent to a family friend's son.
Today we're going back to our BBQ spray-paint roots. OG Mothership kid-with-hand-tools stuff. Let's dive in!
Since replacing all of those suspension components back in December, I had this nagging feeling that it was time to rebuild or replace the brake calipers and rubber brake lines too. They're, what, 25 years old this year. It's time. I ordered some braided brake lines online and got to work.
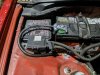
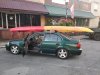
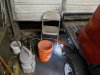
Since I don't have an air compressor at my house anymore, I had to bring the car to the local workshop. And to do that, I needed a ride home. Thusly: trailered Honda motorcycle attached to Honda car!
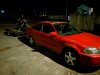
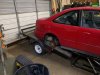
After arriving at the shop, I noticed there wasn't room to really store the trailer, and I didn't have a way to lock it, so it got tetris'ed to fit behind the garage door:
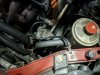
First step: drain the brake fluid.
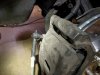
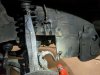
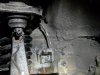
Then remove the banjo bolt to disconnect the rubber brake line.
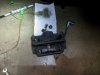
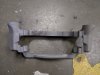
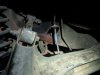
Then the caliper comes off:
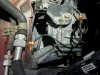
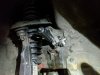
And slider bolts removed:
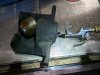
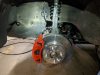
To get the pistons out, I got an air nozzle and held it against the hole where the brake line and banjo bolt used to be:
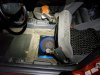
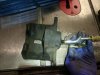
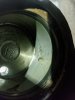
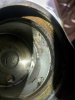
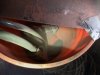
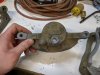
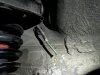
Both calipers had some pitting from corrosion in the sleeve:
Since the rubber gasket that seals the piston shouldn't be affected, I decided to go ahead with the rebuild.
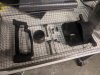
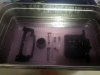
Started by cleaning the calipers with brake-clean, and then ultrasonic cleaned them:
I should have gotten a picture of how disgusting the ultrasonic cleaner water got afterwards
That was it for the first day of tinkering.
I want an ultrasonic cleaner so badly. Cant buy any new tools until the house is built and that is at least another year or two away before we even start breaking ground.
Interest rates are not improving and we are not looking to take a $600,000 loan with +6%. Guess we gonna wait to see who next President is before rates come down.
Loving the content brotha, old school forum walkthroughs.
I hear you. Definitely wish I had that financial discipline haha, I keep getting myself in trouble.
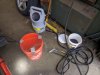
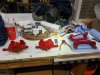
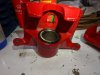
The ultrasonic cleaner did OK-ish here. The calipers got clean enough that I could have gone ahead with the rebuild, but instead I wanted to play a little, so I picked up a Harbor Freight media blaser and 25lbs of 70-grit black oxide. I set up a 5-gal bucket to catch and reuse the media.
It was a disaster! Today I learned how sandblasting media tends to ricochet directly back at you. The stuff went everywhere and even with safety glasses it kept getting in my eyes.
After several frustrating hours my hands (and face) ached and I was almost done! ... With one of four caliper pieces:
I grumpily swept up the media on the floor, and called it a day.
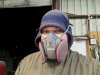
Came back the next day prepared! I brought a face shield and shower curtain. Figured that if I couldn't have a media blasting box, I'd just make one with me in it. I got out a chair, set up the blasting kit, suited up with respirator mask, face shield, and hoodie hood. Then I draped the shower curtain over my head and started working.
A picture a friend sent:
Most of the media and dust was contained in the curtain, and I was able to work for longer stretches with the better respirator and eye protection. Within a couple hours I had the remaining three caliper pieces blasted to a "good enough" state.
Then I decided that running them back through the ultrasonic cleaner was a good way to get the residual grit out... Whoops, they flash rusted.
I made a trip to the auto parts store and picked up some Evaporust, and soaked each piece, carefully patting it dry and then blowing it off with the air compressor.
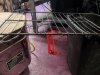
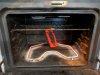
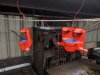
After that each piece was passed through the powder coating oven for a few minutes to make sure they were good and dry. Then they were taped and strung up for powdercoating:
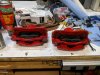
That's just one, but all four got a single coat. They turned out so-so, not perfect but I was thinking "good enough." Buy the time they'd all been baked I was toast, so I left things there and went home for the night.
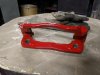
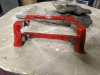
Went back the next day and decided that I wanted to try a second powder coat on the brake parts.
I learned from the first round that I could leave the blue tape on the part while it was baking, which helps keep powder from being knocked loose and falling into areas it shouldn't be. This time I did that for all of the taped areas. If I got to the tape while the part was still hot out of the oven, it was easier to remove cleanly. Once it had cooled it would crumble and be a mess.
I used some 1000 grit sandpaper to knock off any powder inside the piston cylinder, and also to remove some rings of corrosion from the brake pistons themselves.
Something I noticed when doing the original brake job a few weeks ago was that the passenger side pads were more worn, and unevenly. When reassembling the passenger caliper I noticed that the piston really didn't want to seat back into the caliper, it took a ton of force and then just flew backwards into the cylinder. The drivers' side piston slid in pretty easily by comparison.
So I disassembled the passenger side again and hit the inside of the cylinder with a brass wire dremel wheel, and then took some more 1000 grit sandpaper to the cylinder until just about every trace of corrosion or surface hairline cracks were gone. After that it seemed to seat properly.
I love it
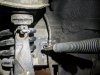
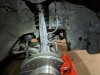
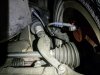
Then I turned to replacing the rubber brake lines with steel braided ones. Unfortunately I rounded off the flare nut on the passenger side before I figured out the trick: Hit the joint with penetrating oil, and then hold a flare nut wrench (of course) in place and tap-tap-tap it with a hammer. That broke all of the other nuts loose easily. But the rounded off one was stuck and I wound up having to give up on it.
OK, time to tackle that last rubber brake line. I used a Dremel to remove the old flare nut:
Then cleaned up the line:
And put a new ASE/Double flare on it:
Looks good! Except... Maybe I forgot something? Like the new flare nut?
Cut the line and re-did the flare with a nut in place:
I had to go into the engine bay and work some extra brake line through the opening so that it'd reach the bracket, hopefully I didn't stress anything too much.
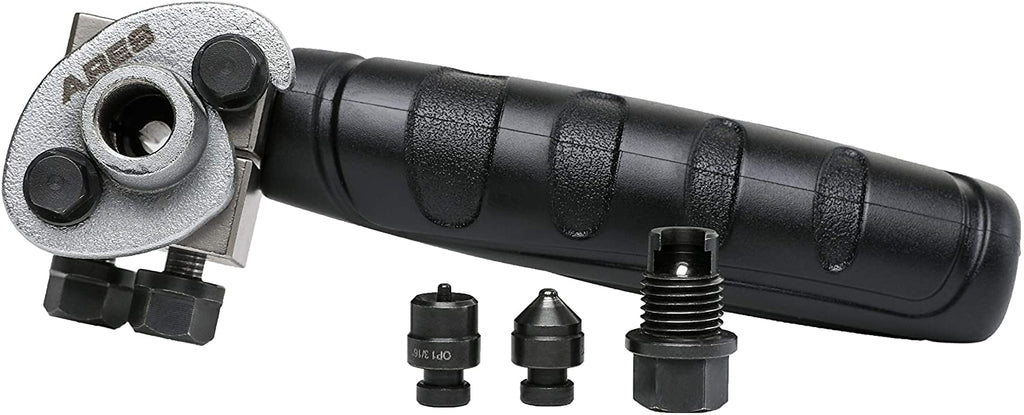
Product Description Easier Double Flaring The ARES 3/16-inch Double Flaring Tool kit includes a flaring tool and an Op1 and Op2 punch, so you'll have everything you need for flaring jobs in one convenient kit. With a compact design, this tool is designed to be used both on-vehicle and in a bench...
Now that the wheel's fallen off and been put back on, I need to get an alignment, and rather than shell out $100 I tried doing it myself with the old kit at the shop.
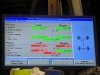
Since it's just me doing this, I tape the sensor wires onto the car, and then roll the whole car forward and back to do the "one rotation" calibration, and then I'll look at the values and jack up one corner to work on. Then I put the car back down and roll it forward and backward some more to settle the suspension again and take an after reading.
I've come back and re-adjusted the car three times now, using a steering wheel clamp, and the steering is still crooked
For some reason the driver side front toe is always way negative out of spec. This is how I left it after my most recent visit, I'm curious if it'll read the same when I go back next:
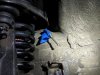
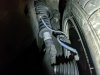
While I was crawling around under the car, I noticed that the new braided brake lines were rubbing on the corner of the wheel:
Not ideal, so I took the brackets off and bolted them back on backwards: